
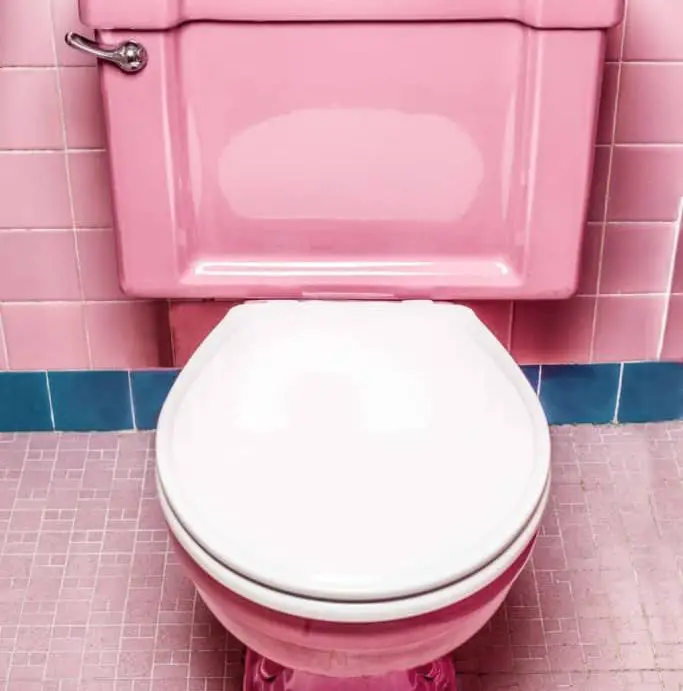
If you’re looking to spruce up your bathroom or if you just want to cover some old stains, then you might be wondering if you can paint a toilet.
You can paint a toilet, but you’ll need to follow 6 steps. First, clean your toilet. Drain it of all water. Sand the surface. Then apply a primer. Then, you can apply your paint. Typically, acrylic latex primer is used followed by an appliance epoxy paint or spray paint and an epoxy sealer.
This is just a brief rundown, and there are lots of small but very important details you need to know before getting started. So let’s dig into the details, and make that old toilet look like a brand new toilet!
Table of Contents
6 Steps for Painting a Toilet
Before you start draining your toilet and making it unavailable for hours, you’ll want to make sure you have all the supplies you need to finish the project. Here’s a short list.
- Eye protection and face mask
- 120 – 160 grit sandpaper
- Acrylic latex primer/basecoat paint
- Paint of your desired color
- Painters tape
- Plastic drop cloth or newspaper
- Clear topcoat/sealant (if using spray paint)
Before we jump into the whole process, there are a couple of things you should know about to make sure you have the right type of paint.
What Type of Paint Can You Use?
There are a couple of different types of paint you can use for your toilet. Primarily, you’ll want to use an acrylic latex primer and then epoxy paint for the main coat.
Epoxy paint is primarily used to touch up or just give a fresh coat to your toilet. This means that they really only come in shades of white, grey, and black.
If you don’t like their color options, you can also just use regular spray paint. This is my personal favorite option because it’s easy to apply and you have a wide range of color choices.
If you choose to go with the epoxy paint then that’s all you need. But, if you go with spray paint, you’ll also want to get a clear epoxy topcoat. This will make your toilet waterproof and more durable while still keeping the color you choose.
Regardless of which paint you choose, you will need to make certain that the area you are working in is well-ventilated especially if you’re using spray paint.
If you’re working inside, open a window, turn on the bathroom fan, and leave the door open. If you’re using spray paint, I highly recommend getting a face mask to keep you from breathing in any of the paint particles.
This is extremely important. Just because you’re only painting a toilet doesn’t mean you don’t need to be safe.
Now that we’ve covered that, let’s get into our 6-step guide for painting a toilet.
1. Clean Your Toilet
Before you do anything, you need to give your toilet a good scrubbing. The paint won’t stick to the surface if there’s dirt and grim.
Clean the inside and outside with whatever you normally use to clean your toilet. Then flush your toilet to give it a good rinse. This is why you don’t drain your toilet of water first.
While you’re cleaning your toilet, remove your toilet seat. You can do this by unscrewing the bolts that hold it in place. You may be able to do this with your fingers, but if not, a pair of pliers or a wrench will help you get them off. This is a good opportunity to also consider if it’s time to get a new toilet seat.
Once your seat is removed, make sure you clean around the holes where the bolts were and remove any rust or mineral deposits that built up around them.
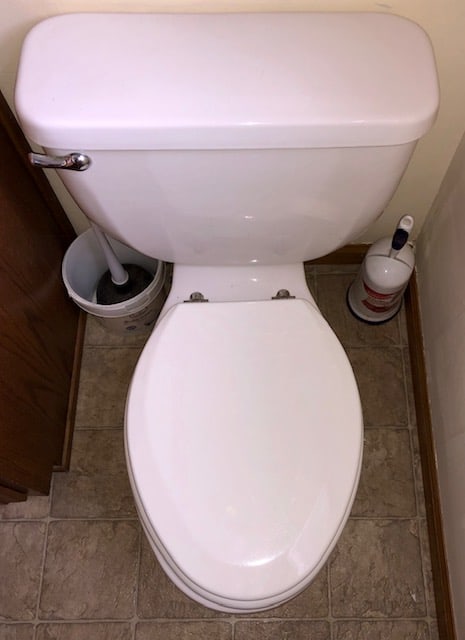
2. Drain the Water
For the paint to stick, your toilet has to be completely dry. This means you have to drain your toilet of water.
You can do this in two ways.
Turning Off the Water
The best way to ensure your toilet is dry and stays dry is to shut off the water to your toilet tank.
To do this, look for the water hook-up that goes to your toilet tank. There should be a valve on this pipe that will cut off the water to your toilet. This will prevent your toilet tank from refilling and keep your toilet dry while you paint.
Your water shutoff valve should look something like this.
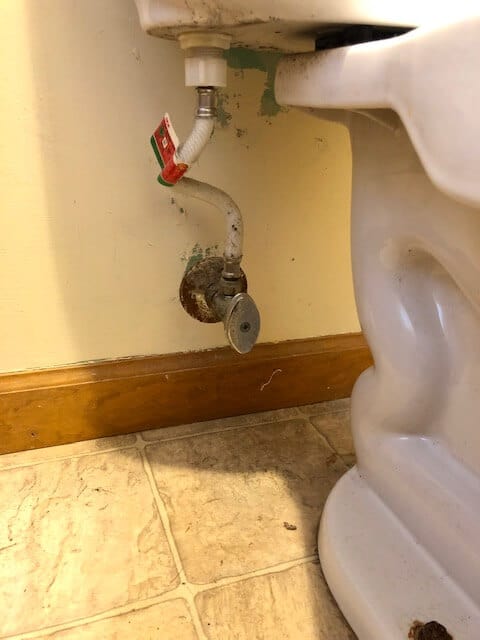
Once you find the water supply, shut it off (righty tighty, lefty loosey).
Next, remove the lid on your toilet tank so you can see inside and flush your toilet. This will remove the water in your tank and in your bowl at the same time.
I had you remove the lid of the tank so you could make sure that it wasn’t refilling. If it is, you might have turned the valve the wrong way. Go back and turn it the other way and try again.
Flushing your toilet may not get all the water out of your toilet, if there’s a lot and still some water left in the tank, try flushing it again. If there’s only a little water, you can probably get rid of it with some towels.
Raising the Tank Float
If you can’t find your toilet shut off valve or you don’t want to mess with it, there’s another way you can keep your toilet from refilling.
Take the lid of your toilet tank, you’ll see something that looks like a balloon on the end of a stick. This is the tank float. Here’s a picture of a toilet tank and a tank flow to see what I mean.
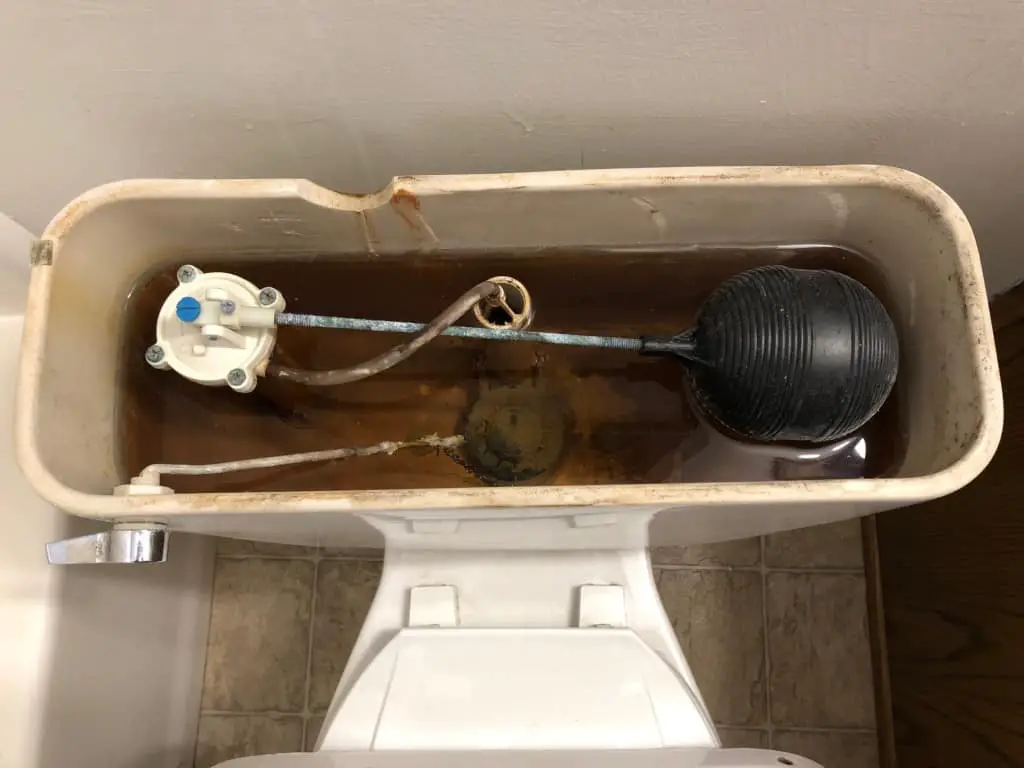
When the water level in the tank drops, so does the float. When it gets to a certain level, it causes the water input to open and let more water refill the tank.
To counteract this process, you just need to keep the tank float from dropping. You can do this by securing the float to the top of the tank somehow, or sticking something under the float so it doesn’t drop.
Once you have the float secure, flush your toilet once or twice to get rid of the water. As with the first way, it may not get rid of all the water, so you may have to sop up some of the leftover water with a towel.
3. Sand Your Toilet
Don’t get too far ahead of yourself, I know it says sand your toilet but you first need to make sure your toilet is completely dry. Best case scenario, leave it overnight to dry.
Once your toilet is completely dry, it’s time for the real work to begin.
Because porcelain is so slick, no paint will stick to it unless it’s been roughed up. That’s where the sandpaper comes in.
Before you start sanding, I would recommend wearing a face mask to prevent any of the small porcelain particles from getting into your lungs.
This is also an excellent time to make sure that the area you’ll be working in is well-ventilated. Remember, open a window, turn on a fan, and keep the door open. You can thank me later.
Now, just grab some sandpaper, you can use anywhere from 120-160 grit, and put your back into it.
You just need to roughen the surface of your toilet so that the paint will stick. In other words, don’t go too crazy, a couple of strokes with the sandpaper should be all you need.
After you sand, your toilet is going to be covered in porcelain dust. So, before you prime, you need to thoroughly clean your toilet again.
Use a vacuum to pick up all the porcelain dust from around the toilet and from the toilet itself. Then, use a dry rag to wipe the toilet. The porcelain dust will stick to the dry rag better than a wet one.
I recommend wiping it down at least twice to make sure there’s no dust left, this will make sure the paint will stick well and you won’t have any spots that could flake off.
4. Apply Primer
Now you get to the fun stuff. Before you start priming, you need to make sure the surface of your toilet is completely dry.
It should be dry since it was dry before you sanded it but if you used a wet rag or any kind of cleaner to clean your toilet after sanding, you want to make sure it’s dry.
If want to get started right away, you could use a hairdryer or a space heater to speed up the drying process.
While your toilet is drying, you can start getting ready to paint.
You’ll need to cover anything you don’t want to paint with painter’s tape and newspaper or plastic drop cloths. You could even use an old shower curtain as a drop cloth.
Cover your walls, your floors, and any cabinetry close to your toilet. Don’t forget to cover the flush handle, the bolts that hold it to the floor, and the plumbing pipes going into the tank.
If you don’t want to try and paint around all of that and in such a small space, you could remove your toilet and paint it outside or in a garage.
But, removing a toilet is a lot of work and, if you live in an apartment, it’s not really feasible. It’s also a lot of work to install the toilet again properly.
If you paint inside, remember kids, the word of the day is ventilation.
After you’re done preparing and your toilet is dry, this step is pretty simple, just paint on your primer. Follow the instructions on your paint for any specific needs the paint has.
Make sure the whole toilet is covered and you’re ready for the next step.
5. Paint Your Toilet
Time to finally start seeing your vision come to life. Now that your toilet is primed and ready, time to paint on your main coat.
Once again, you need to make sure your toilet is completely dry before you paint, the prime you used should tell you how long it needs to dry before you can put on a second coat. Remember, you can either be using epoxy paint or spray paint.
Regardless of what kind of paint you choose, it’s time to put on your first coat. Just like with any painting project, you may need more than one coat.
If you do, make sure your toilet is completely dry before starting the next coat. The paint you choose will tell you how long to wait in between coats of paint.
Once again, if you’re choosing to use spray paint, I recommend wearing a face mask to keep the paint particles out of your lungs. And even if you’re not using spray paint, wearing a mask won’t hurt anything. Who knows, you might like it.
If your paint needs a clear epoxy topcoat, again, make sure it’s totally dry before applying it. I know I sound like a broken record but it won’t stick right if everything isn’t dry.
6. Refill With Water and Enjoy
Woo! You did it! You’ve turned your humdrum, plain-jane toilet into a masterpiece. Now you’ve only got one thing left to do.
Before you refill it with water, you’ll want to give your paint plenty of time to dry, especially if you had to add an epoxy topcoat. If you can manage, letting your toilet dry overnight before you refill would be the best option.
But, if you can’t wait that long, try and leave it for at least a couple of hours. Ask your neighbor if you can use their bathroom or use one at a nearby restaurant or coffee shop. Whatever it takes, let that toilet dry.
Once it’s completely dry, undo whatever you did to shut off the water. Refill the tank. Then flush it, and enjoy your new (looking) toilet.
Painting a Stained Toilet Bowl
A common problem that people have with toilets is their toilet bowl gets stained. Now, there are lots of cleaning products out there that say they can get the stain out of your toilet bowl.
Check out my other post about getting the stain out of a toilet seat for some ideas on what to do. The stains may also be caused by hard water and rust stains, if that’s the case you can try cleaning your toilet with WD-40 which somehow magically gets those rust stains out.
But, if you’ve tried everything and it’s still stained, you can repaint your toilet bowl to make it look shiny and new.
The steps to painting your stained toilet bowl are the same as for painting your whole toilet, you just don’t have to paint as much. Let’s go through them real quick
1. Clean Your Toilet
Just like above, you’ll want to give your toilet a good cleaning before you start. If you’re just painting the bowl though, you only need to clean the bowl and around the rim.
Make sure you clean up and under the rim of your toilet where the water trickles in. Use a rag or paper towel to get up as far as you can.
Then, once you think it’s good to go, give it a flush.
2. Drain the Water
Because you’re painting the bowl, it’s even more important to make sure your bowl is completely drained.
Either shut off your water valve or raise your tank float. For more in-depth information about it, you can jump back up and read about it here.
Once your water is shut off, flush your toilet and wipe out the rest of the water. Make sure you get all the way into the drain and remove all the water.
3. Sand Your Toilet Bowl
This step is once again the same as previously mentioned. Sand the inside of your bowl until it’s rough. Then wipe out all the porcelain dust and let your toilet dry.
4. Apply Primer
Once your toilet is completely dry, apply an acrylic latex primer to the inside of your bowl. This ensures the paint sticks to the porcelain.
5. Paint Your Toilet
After your primer is completely dry, paint the inside of the bowl.
For painting over a stain or repairing the inside of your toilet, you’ll want to use epoxy paint. It’s also called epoxy appliance paint. Since most toilets are the same shade of white, you should be fine getting the default white color for the paint.
Epoxy appliance paint comes in both liquid and spray forms. Choose whichever one you prefer to use. Then just apply it to your toilet bowl keeping in mind that you may need two coats.
Because this paint is epoxy-based, you don’t need to use an epoxy topcoat.
When you’re painting the inside of your bowl, be careful painting around the rim. There are small holes under the rim that allow water to trickle down from the tank. If you paint over these holes you could plug them up and prevent them from letting the water flow.
If you do paint over some of these holes, you can scrape the paint off using a knife or poke through the hole using a needle or screwdriver depending on how large the opening is.
6. Refill Your Toilet
And that’s all there is to it! Pretty easy way to make your stained toilet look brand new. It’s a great way to spruce up your bathroom and it will also increase the appeal if you’re trying to sell your home.
Make sure your toilet is completely dry before you refill it. The can of your epoxy paint will tell you how long it needs to dry before it can be refilled.
For the spray paint, it needs about two hours, for the liquid paint it probably needs closer to 4 hours to make sure it’s completely dry.
Then, you can refill your tank and enjoy your shiny, new-looking toilet.
Why Should You Paint Your Toilet?
There are quite a few benefits you can get from painting your toilet, plus it’s kind of fun.
Painting your toilet a new color will:
- Add a pop of color to your bathroom
- Match the toilet to your bathroom design
- Cover up imperfections and stains
- Filling in imperfections makes it easier to clean
- Ups the appeal to new homeowners if you’re trying to sell your home
Painting your toilet is an easy, low-risk project that can help your bathroom look like new which is great if you’re renovating the entire bathroom and want the old toilet to match.
And, if you’re planning to sell your home, it’s a low-cost project to help up the appeal to new homeowners, no one wants to buy an old rusty, crusty toilet.
Related Questions
What kind of paint do you use on a toilet?
For painting a toilet, you first need an acrylic latex primer. Then you can either use appliance epoxy paint or spray paint. If you use spray paint, you’ll also need to use a clear epoxy topcoat. If you just need to touch up your toilet, you can use epoxy appliance paint.
Can you paint a stained toilet bowl?
You can paint a stained toilet. To do this, clean your toilet and then drain it of all water. Then sand it and apply an acrylic latex primer to the inside of the bowl. Once it’s dry, paint over it using an appliance epoxy paint. Let it dry and then turn your water back on.
Can you paint a toilet seat?
How you paint a toilet seat will depend on what it’s made out of. A porcelain seat will need to be cleaned, sanded, primed, and then painted. If it’s plastic or enameled, you can just paint it and then add a clear epoxy topcoat. If you have a wood (vs a plastic) toilet seat, I would not recommend painting it.